Checking a Fuse
Fuses are commonly used to protect automotive circuits from excessive current. They contain a metal strip thick enough to allow only a certain amount of current to pass. The thicker the metal strip, the more current or amperage can pass through. If amperage exceeds the amount this strip can handle, the strip will burn in two and create an open circuit. Think of it as a weak point in the circuit. The thickness of this metal strip determines the fuse's rating.
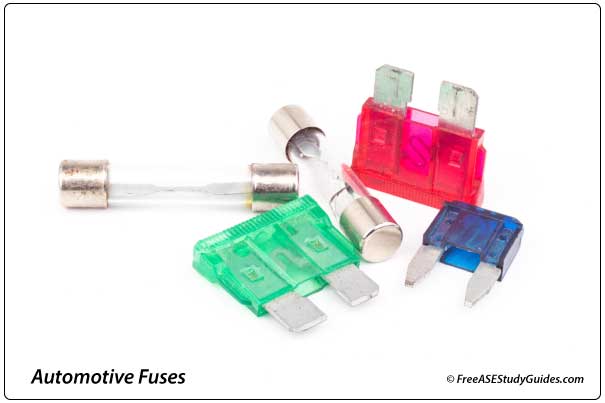
Different fuses, including the glass cartridge, bladed, and ceramic, are used on modern vehicles. Most fuses found on today's vehicles are bladed. They're color-coded according to their amperage rating.
The fuse must be replaced when the metal strip melts. It's important to find the reason for the burned fuse. The fuse most likely blew because of excessive current flow or circuit overload. If the circuit has repeated fuse failure, check it for a short to ground.
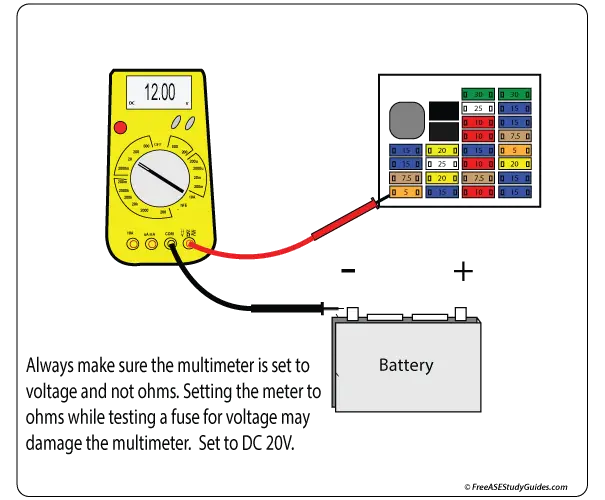
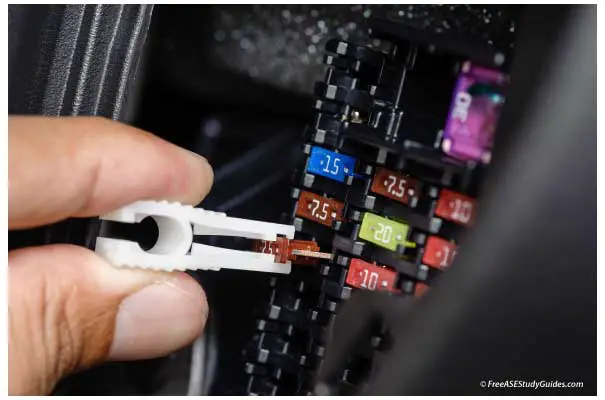
Always use the proper test light or voltage meter to check the vehicle's fuses. Turn the ignition switch to the run position. Clamp the end of the test light or the negative cable of the voltage meter to a good ground close to the fuse box. Check one end of the first fuse. It should light the test light or show 12.6 volts on the voltage meter. Move to the other end of the same fuse and check that tab. It should light the test light or show the voltage on the meter. If it does not, remove the fuse and visually inspect it. Look for looseness or cracked and blown fuses. After removal, check the fuse for continuity with an ohmmeter. Some circuits may not be powered through the ignition switch. Most fuse boxes contain a legend. If in doubt, check the manufacturer's manual.